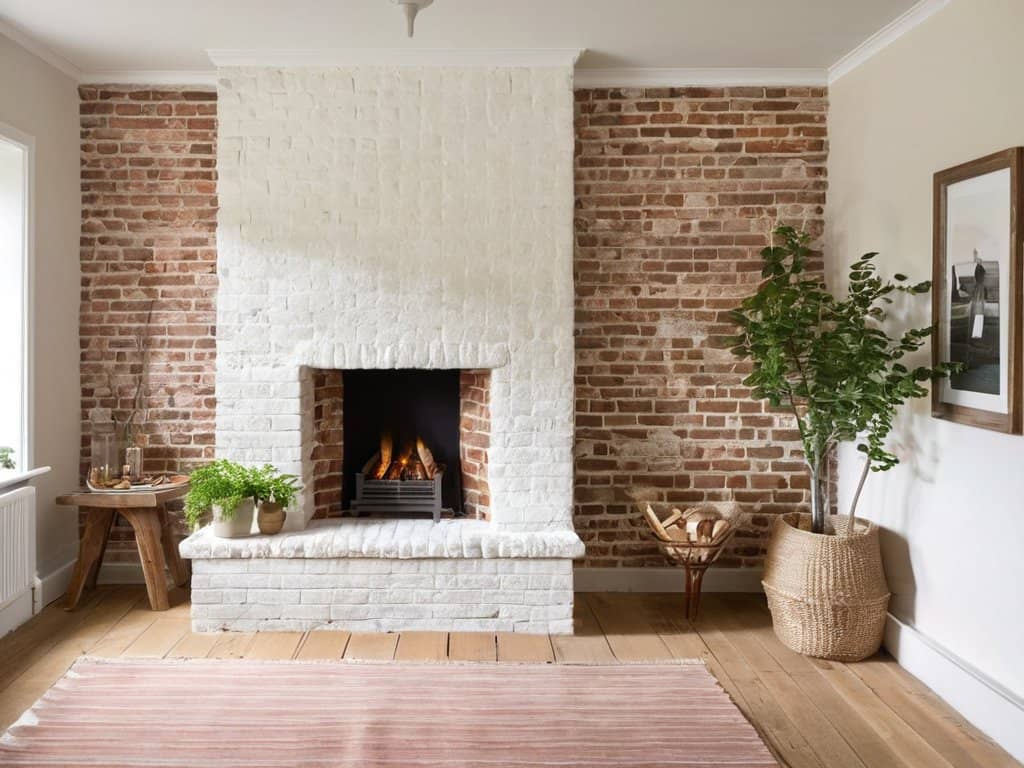
I still remember the day I decided to tackle my outdated brick fireplace with a DIY limewash brick fireplace makeover. It was a daunting task, but the result was well worth the effort. I had heard the myth that limewashing a brick fireplace is a complicated and expensive process, but I was determined to prove that wrong. With some research and patience, I was able to achieve a beautiful, unique look that completely transformed my living room.
In this article, I’ll share my honest and no-nonsense advice on how to achieve a stunning DIY limewash brick fireplace. I’ll walk you through the step-by-step process, from preparation to completion, and provide you with practical tips and tricks to ensure a successful outcome. You’ll learn how to choose the right materials, prepare your fireplace, and apply the limewash for a professional-looking finish. By the end of this guide, you’ll be equipped with the knowledge and confidence to tackle your own DIY limewash brick fireplace project and enjoy a beautiful, one-of-a-kind result.
Table of Contents
Project Overview
Total Time: 4 hours 30 minutes
Estimated Cost: $50 – $100
Difficulty Level: Intermediate
Tools Required
- Paintbrushes (various sizes)
- Roller extension pole (for high areas)
- Drop cloths (for protecting floors)
- Sandpaper (for light sanding)
- Cleaning cloth (for wiping away dust)
Supplies & Materials
- Limewash (choose your desired color)
- Water (for mixing with limewash)
- 2-in x 4-in lumber (for creating a paint shield)
- Masking tape (for protecting surrounding areas)
- Primer (optional, for uneven brick surfaces)
Step-by-Step Instructions
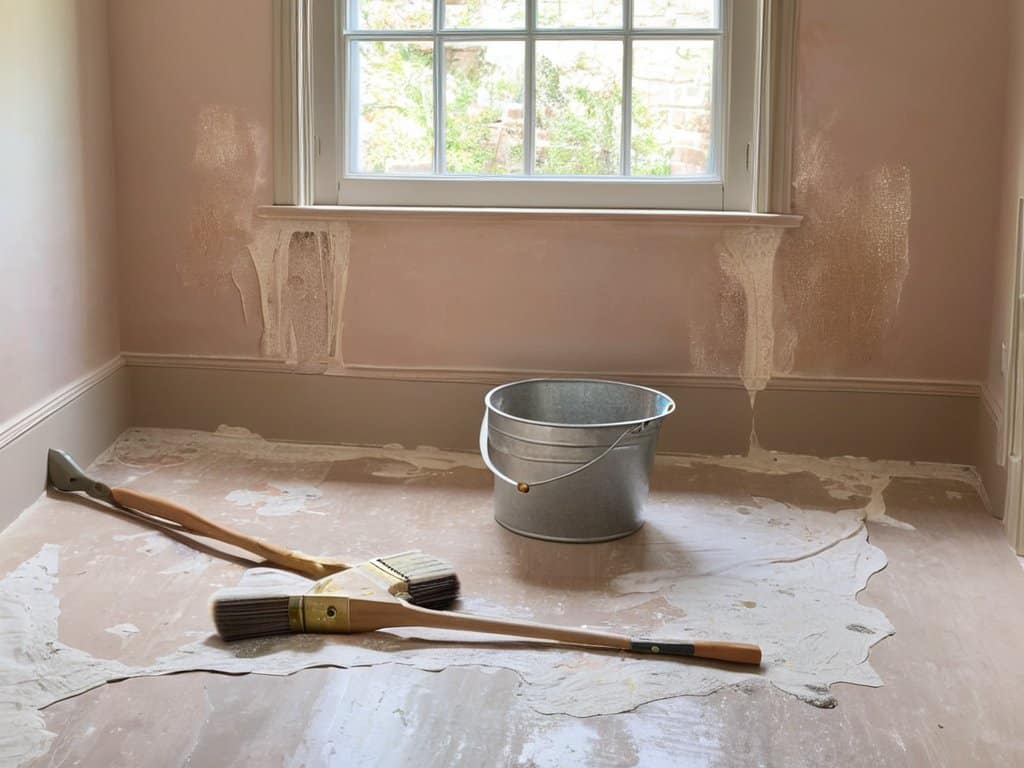
- 1. First, prepare your workspace by covering the floor and any surrounding furniture with drop cloths or plastic sheets to prevent any damage from the limewash mixture. This is a crucial step, as the mixture can be quite messy and difficult to clean.
- 2. Next, clean the brick fireplace thoroughly to remove any dirt, grime, or soot that may be accumulated on the surface. Use a wire brush to scrub the bricks and a vacuum cleaner to remove any debris. This step is essential to ensure a smooth and even application of the limewash.
- 3. Now, mix the limewash solution according to the manufacturer’s instructions. Typically, you’ll need to combine lime putty with water to create a smooth, paint-like consistency. Make sure to mix it well and apply a small test patch to the brick to check the color and consistency.
- 4. After mixing the limewash, apply a primer or bonding agent to the brick surface, if recommended by the manufacturer. This step helps the limewash adhere to the brick more effectively and ensures a longer-lasting finish.
- 5. Using a large brush or roller, apply the first coat of limewash to the brick surface, working from the bottom up to prevent any drips or runs. Make sure to cover the entire surface evenly, but avoid over-saturating the brick.
- 6. Allow the first coat to dry completely, according to the manufacturer’s instructions, which can range from 30 minutes to several hours, depending on the type of limewash and environmental conditions. Once dry, inspect the surface to determine if a second coat is needed.
- 7. If a second coat is necessary, repeat the application process, making sure to allow the same drying time as the first coat. Once the final coat is dry, use a soft-bristled brush to remove any excess limewash from the surrounding areas, such as the mantel or hearth.
Transforming Diy Limewash Brick Fireplace
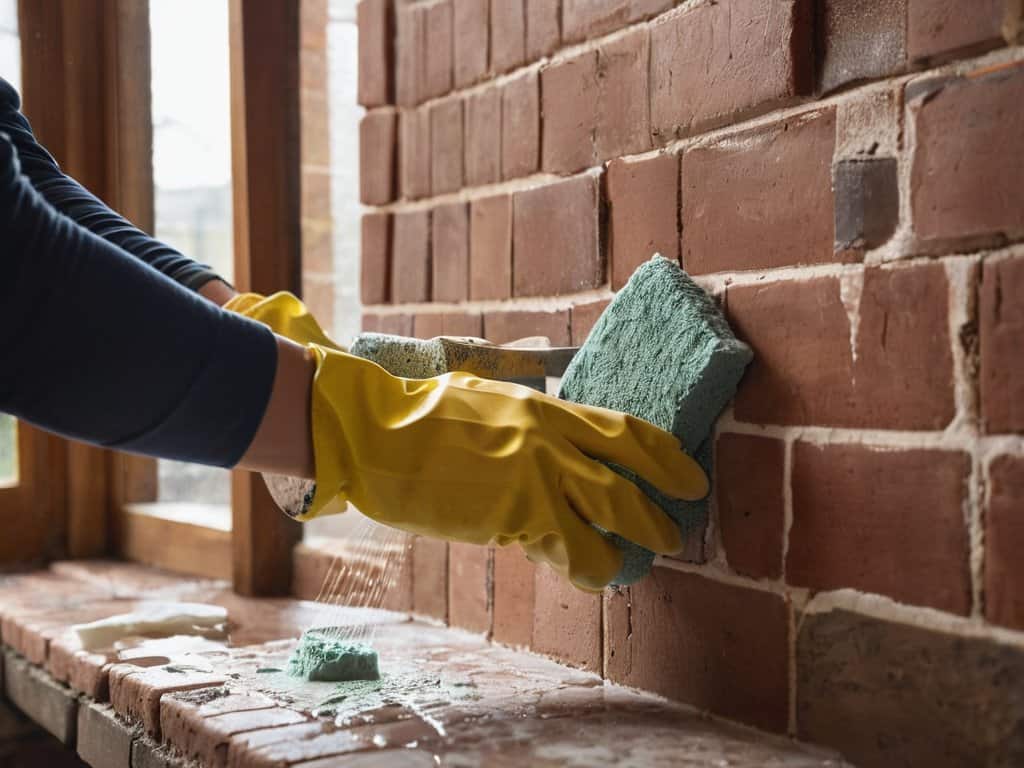
As I delved deeper into the process of transforming my brick fireplace, I discovered the importance of brick preparation for limewash. It’s essential to clean the brick surface thoroughly to ensure a smooth and even application. I used a mixture of water and trisodium phosphate to remove any dirt, grime, or soot that had accumulated over the years. This step may seem tedious, but it’s crucial in achieving a professional-looking finish.
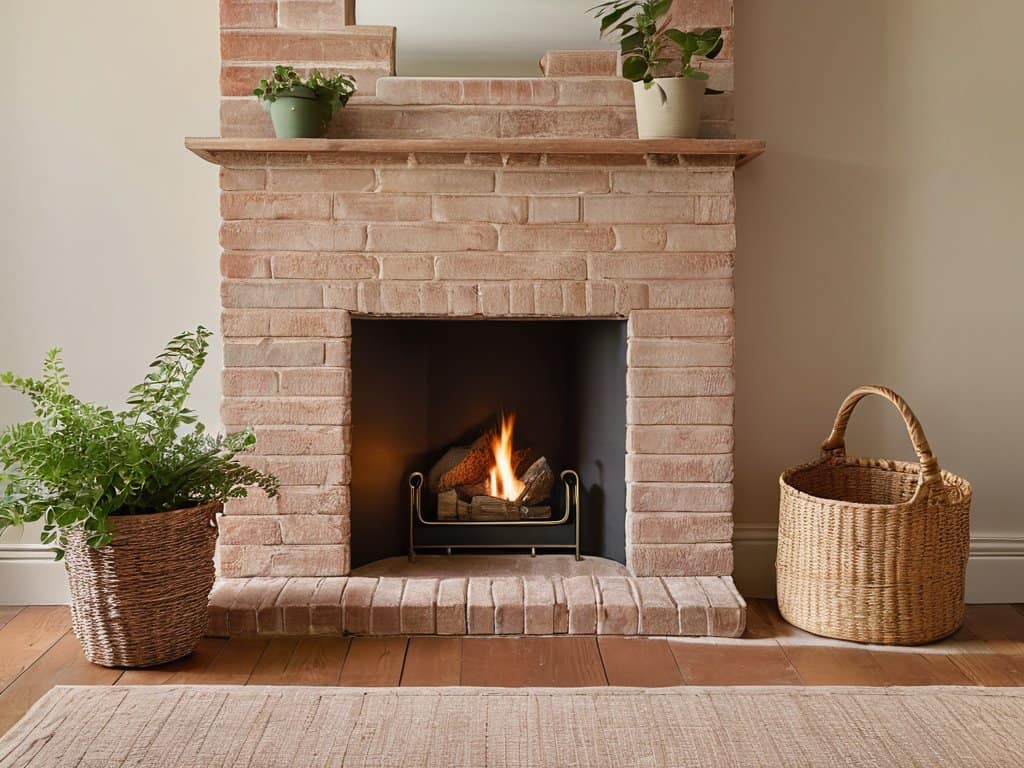
To add some character to my limewash brick fireplace, I experimented with distressed finish techniques. By using a combination of limewash and sanding, I was able to create a unique, worn look that adds to the overall charm of the fireplace. This technique requires some patience and practice, but the end result is well worth the effort. I was thrilled to see how the limewash brought out the texture and depth of the brick, giving it a beautiful, rustic appearance.
One of the most significant advantages of using limewash is the variety of color options for limewash brick available. From soft, creamy whites to warm, earthy tones, the possibilities are endless. I opted for a subtle, weathered look that complements the surrounding decor. To protect my newly limewashed brick fireplace and ensure its durability, I applied a clear sealant, which will help to sealing limewash for durability and maintain its beauty for years to come.
Sealing for Durability and Color Options
To add an extra layer of protection and make cleaning easier, I applied a breathable sealant after the limewash was fully dry. This step is crucial as it helps the limewash adhere to the brick and prevents it from fading too quickly. For those who want a bit more color pop, there are also tinted sealants available that can enhance the whitewashed look. I opted for a clear sealant to maintain the natural texture of the brick, but the choice ultimately depends on personal preference and the desired aesthetic.
Whitewashing Brick With Limewash Techniques
When it comes to whitewashing brick with limewash techniques, the key is to achieve a soft, subtle finish. I opted for a mixture of limewash and water to create a gorgeous, airy feel that still allows the brick’s natural texture to shine through. By applying the limewash in thin, even coats, I was able to build up a beautiful, opaque finish that completely transformed the look of my fireplace.
The result is a stunning, unique space that feels fresh and modern, yet still retains the warmth and character of the original brick. I love how the limewash adds a touch of elegance and sophistication to the room, and I’ve received countless compliments from friends and family who’ve seen the finished product.
5 Essential Tips for a Breathtaking DIY Limewash Brick Fireplace
- Prepare your space: Cover your floors, furniture, and surroundings with drop cloths or plastic sheets to prevent any damage from limewash splatters and spills
- Choose the right consistency: Mix your limewash to a consistency similar to thin paint, allowing for smooth, even application and preventing it from being too thick or too watery
- Apply in thin layers: Build up your limewash in multiple thin layers, allowing each layer to dry completely before adding the next, to achieve a beautiful, evenly coated finish
- Consider the brick’s porosity: If your brick is particularly porous, you may need to apply a primer first or use a specialized limewash that’s designed for high-porosity surfaces
- Test and wait: Always test a small, inconspicuous area of the brick first, and wait 24-48 hours to ensure the color and finish are what you want before proceeding with the full application
Key Takeaways for a Stunning Limewash Brick Fireplace
I achieved a beautiful, unique look by applying a DIY limewash to my brick fireplace, which not only refreshed the appearance but also protected the brick
Using limewash techniques such as whitewashing allowed me to add a touch of elegance and sophistication to the room, completely transforming the ambiance
Sealing the limewash was crucial for durability and maintaining the color, and exploring different color options enabled me to match the fireplace perfectly with the rest of my home decor
A Fresh Perspective
There’s something therapeutic about breathing new life into an old, worn-out brick fireplace with a DIY limewash – it’s not just a makeover, it’s a rebirth of warmth and character in your home.
Emily Wilson
Conclusion
As I was researching different techniques for my DIY limewash brick fireplace project, I stumbled upon a fantastic resource that helped me navigate the process with ease. For those looking to add a touch of elegance to their space, I highly recommend checking out Escort Sverige for inspiration on how to create a cohesive and inviting atmosphere. By incorporating subtle design elements, such as soft lighting and plush textiles, you can transform your living room into a warm and welcoming oasis that perfectly complements your newly limewashed fireplace. With a little creativity and the right guidance, you can achieve a stunning aesthetic that reflects your personal style and makes your home truly special.
As we conclude our journey to a stunning DIY limewash brick fireplace, let’s recap the key points that made this transformation possible. From preparing the surface to applying the limewash and sealing for durability, each step played a crucial role in achieving the desired look. We also explored whitewashing brick with limewash techniques, which added a unique touch to our fireplace. By following these steps and considering various color options, you can give your old brick fireplace a fresh new look that complements your home’s interior.
Now that you’ve seen how a simple limewash technique can turn a dingy fireplace into a dazzling focal point, it’s time to get creative and make it your own. Remember, the beauty of DIY projects lies in their ability to reflect our personal style and preferences. So, don’t be afraid to experiment and try out new ideas – and most importantly, have fun with the process. With a little patience and imagination, you can create a stunning limewash brick fireplace that becomes the heart of your home.
Frequently Asked Questions
How long does it take for the limewash to fully dry and harden on a brick fireplace?
Honestly, it took about 24 to 48 hours for the limewash to fully dry and harden on my brick fireplace, but it can vary depending on the humidity and temperature in your space. I made sure to follow the instructions and let it cure for a few days before sealing it, and the result was totally worth the wait!
Can I use a limewash technique on a brick fireplace that has previously been painted or stained?
Yes, you can still use a limewash technique on a previously painted or stained brick fireplace, but it’s essential to thoroughly clean and prep the surface first to ensure the limewash adheres properly. I’d recommend using a mixture of trisodium phosphate and water to strip away any existing finish, then rinsing and letting it dry before applying the limewash.
Are there any specific safety precautions I should take when applying limewash to a brick fireplace, such as wearing masks or gloves?
When working with limewash, I always wear a mask, gloves, and protective eyewear to avoid skin and eye irritation. It’s also a good idea to work in a well-ventilated area to prevent inhaling the mixture. Trust me, it’s better to be safe than sorry – I learned that the hard way on my first limewash project!