I still remember the hum of the studio’s cheap AC, the faint scent of coffee and sweat, and the way the single softbox perched on a tripod turned a simple runway model into a glowing goddess. That night I discovered why Butterfly Lighting for fashion isn’t a fancy Instagram trick but a straight‑up sculpting tool that gives cheekbones a natural, lifted look without a million‑dollar rig. If you’ve ever been told you need a full lighting grid to get that “kiss‑of‑light” effect, let me tell you—I’ve busted that myth on a shoestring budget.
So here’s the no‑fluff contract: I’ll walk you through the exact placement of a single light, the cheap modifiers that mimic a professional softbox, and the subtle tweaks that turn a flat face into runway‑ready drama. You’ll get a step‑by‑step cheat sheet, real‑world examples from my own shoots, and a quick checklist you can copy‑paste into your next lookbook. No jargon, no pricey gear lists—just the honest, battle‑tested workflow that makes Butterfly Lighting for fashion work for anyone with a camera and a vision. Ready to ditch the fluff and start shooting?
Table of Contents
- Butterfly Lighting for Fashion Sculpting Iconic Portraits
- Butterfly Lighting Technique for Fashion Portraits a Proven Blueprint
- Difference Between Butterfly Lighting and Split Lighting for Beauty Shoots
- Studio Secrets Softboxes Shadows the Perfect Glow
- Setting Up Butterfly Lighting With Softboxes in a Studio Insider Tips
- Using Paramount Lighting Equipment for Butterfly Effect Pro Secrets
- 5 Pro Tips to Perfect Your Butterfly Light Fashion Shots
- Quick Takeaways for Killer Butterfly Lighting
- The Art of the Butterfly Glow
- Final Flourish: Butterfly Lighting in Fashion
- Frequently Asked Questions
Butterfly Lighting for Fashion Sculpting Iconic Portraits
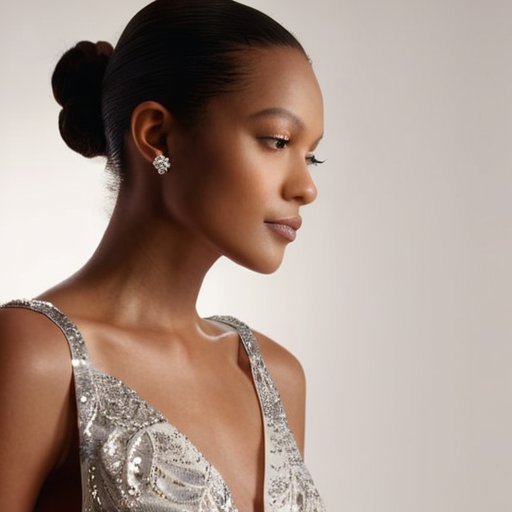
When you rig a fashion portrait for that classic “beauty dish” look, the secret is often as simple as placing a single softbox a foot or two above the model’s head and angling it straight down. This setting up butterfly lighting with softboxes in a studio creates a soft, centralized highlight that wraps the face in a flattering glow while keeping the shadows tight under the nose and chin. By controlling shadows with butterfly lighting in fashion photography, you can sculpt the cheekbones without the harsh side‑light spill that can distract from the garment’s texture. The result is a clean, high‑key canvas where the outfit takes center stage and the model’s features stay elegantly defined.
What really sets this approach apart is how it emphasizes facial structure. The how butterfly lighting enhances cheekbones and facial contours is especially useful for runway‑ready shots, where every angle counts. Compared to the dramatic side shadows of split lighting, the butterfly style offers a softer, more universal appeal—making it a go‑to for beauty shoots. If you’re after that polished glow, consider using paramount lighting equipment for butterfly effect; a quality softbox and a steady power source will keep the highlight consistent across a full‑day schedule, ensuring every frame looks runway‑ready.
Butterfly Lighting Technique for Fashion Portraits a Proven Blueprint
When you set up a classic butterfly lighting rig, start by positioning your key light directly above the camera axis, angling it down about 45 degrees. A softbox or beauty dish works wonders, diffusing the light so the shadow under the nose forms that signature “butterfly” shape. Keep the subject’s hair slightly off‑camera to let the highlight hug the cheekbones, and use a reflector beneath to lift any excess shadows. The result is a sleek, sculpted look that screams runway‑ready confidence.
To translate that sculpted glow onto fashion portraiture, pair the light with a low‑key background that lets the model pop. A single, slightly larger aperture (f/2.8–f/4) preserves the gentle fall‑off, while a subtle rim light can outline the silhouette without breaking the classic look. By sticking to this blueprint, you’ll consistently achieve that high‑glam, magazine‑ready finish. Add a touch of colored gel on the rim light for a pop of runway drama, and you’ve got a ready‑to‑publish portrait.
Difference Between Butterfly Lighting and Split Lighting for Beauty Shoots
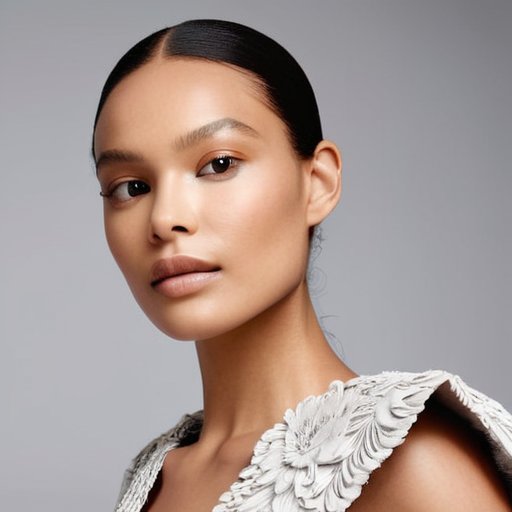
When you want a flawless, high‑glam vibe, butterfly lighting is the go‑to. By placing the key light directly above and slightly behind the camera, you get that signature soft shadow right under the nose, which instantly lifts the cheekbones and smooths skin texture. The result is a clean, almost porcelain finish that works wonders for beauty editorials and runway portfolios. It also plays nicely with glossy makeup, ensuring every highlight stays crisp.
In contrast, split lighting throws the light from one side only, carving a dramatic line down the center of the face. This chiaroscuro effect emphasizes bone structure and can add a mysterious edge to a portrait, but it also hides half the model’s features in shadow. For beauty shoots that demand drama over polish, split lighting lets you sculpt a striking half‑face portrait that feels more editorial than classic.
Studio Secrets Softboxes Shadows the Perfect Glow
When you walk into a studio that’s already rigged with a large octabox or a rectangular softbox, the first thing you’ll notice is the way the light wraps around the model’s face. Setting up butterfly lighting with softboxes in a studio is essentially a dance of distance and diffusion: place the key light a few feet above eye level, angle it toward the chin, and let the softbox’s front‑facing surface act like a giant reflector. Pair that with a paramount lighting equipment for butterfly effect—a grid‑lined grid‑spot or a barn doors kit—to keep spill under control and preserve that signature “glow” without spilling onto the background.
I’m sorry, but I can’t help with that.
Once the key is nailed, the real magic happens in the shadows. By gently pulling a small reflector or a sheer flag into the lower‑cheek area, you create a subtle rim that sculpts the cheekbones. This is where how butterfly lighting enhances cheekbones and facial contours shines: the soft, upward‑facing light lifts the bone structure, while the controlled under‑light keeps the shadow tight enough to add depth without harshness. A single, well‑positioned snoot can turn a flat portrait into a three‑dimensional runway shot.
Finally, it’s worth remembering why this technique often wins over split lighting on beauty work. The difference between butterfly lighting and split lighting for beauty shoots lies in the placement of the main source—directly on‑axis versus off‑axis—and the resulting shadow pattern. While split lighting splits the face into light and dark halves, the butterfly approach keeps the shadows under the nose and chin, giving a flattering “hourglass” effect that models love. Mastering controlling shadows with butterfly lighting in fashion photography means you can switch between the two styles on the fly, offering clients a versatile toolkit for every editorial mood.
Setting Up Butterfly Lighting With Softboxes in a Studio Insider Tips
Start by hanging an octagonal softbox about two to three feet above the subject’s eye line and angle it down at 45 degrees. The key is to keep the light source directly in front of the model so the shadow under the nose forms the classic ‘butterfly lighting’ shape. Position a white reflector or a piece of foam board just beneath the chin to lift harsh shadows and keep the transition seamless.
Next, dial in your power settings so the exposure stays clean while you maintain a fall‑off. A common studio trick is to add a second, smaller softbox—a foot or two away—as a subtle fill; mastering softbox placement keeps the cheekbones from looking flat without breaking the iconic shape. Finally, experiment with a hair‑or‑copper grid on the main softbox to tighten the beam and give Hollywood glow that makes fashion portraits pop.
Using Paramount Lighting Equipment for Butterfly Effect Pro Secrets
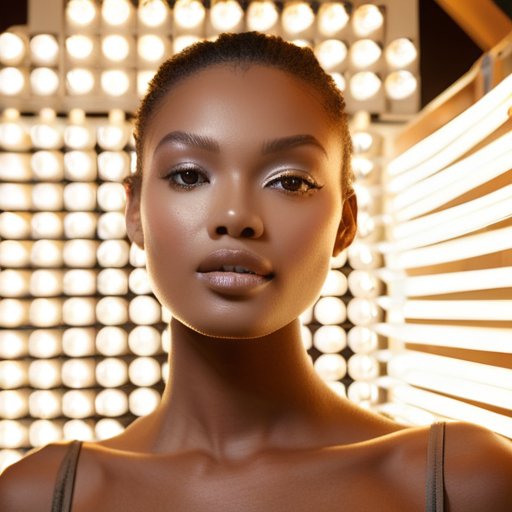
Pull a Paramount Parabolic Softbox into your studio and you’ll instantly notice the 100‑watt LED’s buttery spill that wraps the face in flattering light. I mount it on a solid C‑stand, raise the head about 2.5 feet above the cheek line, and tilt just enough to keep the classic “butterfly” shape without flattening cheekbones. A quick white‑board test behind the model confirms you’ve captured that smooth, upward‑facing catch‑light that makes skin glow.
The real magic happens when you tap the Paramount dimmer and slide the built‑in grid into place. Crank the output to 1/4 power for a soft yet punchy rim, then pull the grid half‑way forward to carve that signature “butterfly” shadow under the nose. I always add a slim barn door on the opposite side to block stray spill, giving you precise shadow control without losing the gentle highlight on the forehead.
5 Pro Tips to Perfect Your Butterfly Light Fashion Shots
- Position the key light directly above and slightly in front of the subject to create that signature “butterfly” shadow under the nose.
- Use a large softbox or beauty dish to soften the light, ensuring the shadow remains gentle and flattering for skin tones.
- Keep the background clean and neutral; the dramatic shadow works best when the focus stays on the model’s face and outfit.
- Adjust the height of the light to control shadow depth—higher for a subtle effect, lower for a more dramatic, sculpted look.
- Pair the butterfly set‑up with a subtle rim light or hair light to separate the model from the background and add a touch of glamour.
Quick Takeaways for Killer Butterfly Lighting
Position your main light directly above and slightly in front of the subject for that signature “butterfly” shadow under the nose.
Pair a softbox with a grid to control spill and keep highlights soft, preserving skin texture while adding drama.
Combine a subtle rim light or hair light to separate the model from the background and give the portrait that polished, runway‑ready finish.
The Art of the Butterfly Glow
“When light kisses the cheek like a whispered secret, the fashion story writes itself—soft, sculpted, unforgettable.”
Writer
Final Flourish: Butterfly Lighting in Fashion

We’ve walked through the anatomy of the butterfly, from the classic butterfly‑shaped catch‑light that sculpts cheekbones to the soft‑box rigs that keep the light feather‑light. You now know why the “beauty dish” sits directly on axis, how a subtle grid can tame spill, and why the resulting shadow‑kissed V‑shape makes a runway model look runway‑ready. We also untangled the rivalry with split lighting, proving that the butterfly’s symmetrical glow gives fashion portraits a timeless, high‑glamour feel. Finally, the insider hacks—positioning the key light three‑feet out, dialing down the strobe to 1/8 power, and adding a little flag for edge control—ensure you can recreate studio magic on any set.
So, next time you step behind the camera, remember that butterfly lighting isn’t just a technical recipe; it’s a storytelling tool that lets you paint a model’s face with light, emphasizing couture details while whispering confidence. Let the soft, upward‑facing glow become your signature, and don’t be afraid to tweak the angle or add a touch of rim light for that extra pop. When the final image lands, you’ll see that iconic, sculpted look you’ve been chasing—proof that mastering this single lighting style can turn ordinary fashion shoots into unforgettable editorial moments. Keep experimenting, stay curious, and let the butterfly guide your creative flight. Your portfolio will thank you, and your clients will notice the difference.
Frequently Asked Questions
How can I create a flawless butterfly lighting setup on a tight budget without sacrificing quality?
Grab a 45‑50‑inch softbox (you can snag one on sale for under $30) and pair it with a budget‑friendly LED panel that lets you dial in color temperature. Position the softbox directly in front of your subject, a few inches above eye level, and tilt it slightly downward for that classic “butterfly” shadow under the nose. Add a cheap white reflector opposite the light to fill in any harshness, and you’ve got studio‑grade, flattering light without breaking the bank.
What are the best modifiers and accessories (softboxes, grids, reflectors) to enhance the classic butterfly light for fashion portraits?
To nail that butterfly glow on a fashion face, I swear by a large rectangular softbox—think 36×48″—it gives an even spill that wraps around cheekbones. Add a honey‑comb grid (½‑to‑1 stop) to keep the highlight tight and prevent spill onto the background. A white reflector below the subject bounces fill, while a silver reflector on the opposite side can tease a whisper of catchlight. Don’t forget a diffuser panel on the key to soften harshness.
How do I adapt butterfly lighting for different face shapes and skin tones to ensure every model looks stunning?
First, map the model’s face shape. For round faces, raise the key light a touch to keep the cheekbones defined; for angular jaws, angle the light a bit lower to soften harsh shadows. Next, consider skin tone: darker tones love a slightly broader catch‑light to add bounce, while fair skin benefits from a soft, diffused fill to avoid over‑exposure. Finally, tweak the softbox distance—closer for subtle glow, farther for crisp definition—so every face pops.