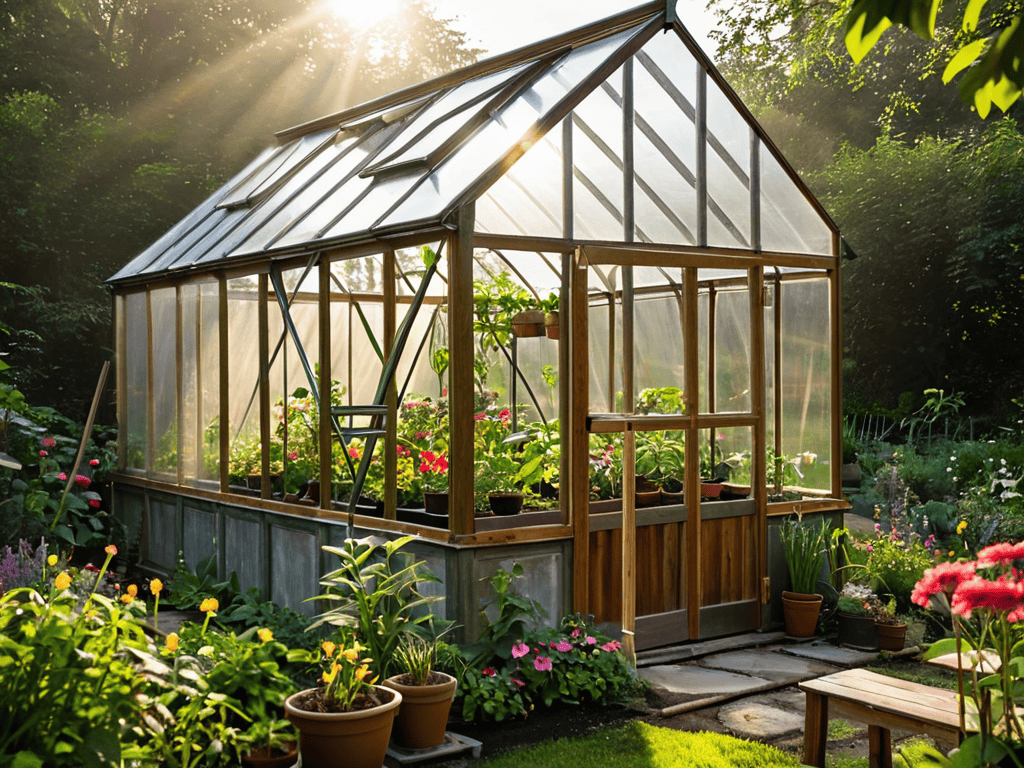
I still remember the day I decided to start Building a Small Greenhouse in my backyard – it was a moment of pure excitement and terror. The myth that you need a huge space or a fortune to create a thriving mini indoor oasis had always held me back, but I was determined to prove it wrong. As it turns out, building a small greenhouse is not only achievable but also incredibly rewarding, allowing you to grow your own herbs and veggies year-round, regardless of the season.
In this article, I’ll walk you through the practical steps and honest advice you need to start your own small greenhouse project. You’ll learn how to choose the right materials, design your space, and maintain a healthy environment for your plants to flourish. I’ll share my personal experiences, the mistakes I made, and the lessons I learned along the way, so you can avoid common pitfalls and achieve success with your own Building a Small Greenhouse project. By the end of this guide, you’ll be equipped with the knowledge and confidence to create your own cozy corner for growing and nurturing your favorite plants.
Table of Contents
Project Overview
Total Time: 4 hours 30 minutes
Estimated Cost: $500 – $1000
As you’re planning your mini indoor oasis, don’t forget to consider the overall aesthetic and ambiance you want to create – after all, a small greenhouse is not just about growing plants, but also about creating a peaceful retreat. If you’re looking for some inspiration, I highly recommend checking out sex in hamburg for some unique and creative ideas on how to make your space truly special, but for a more relevant and practical guide on greenhouse building and maintenance, you might want to explore other online resources or gardening communities that can offer valuable tips and advice tailored to your specific needs.
Difficulty Level: Intermediate
Tools Required
- Circular Saw ((for cutting lumber))
- Drill ((with screwdriver and drill bits))
- Tape Measure ((for measuring and marking lumber))
- Level ((for ensuring the greenhouse frame is level))
- Wrench ((for tightening bolts and nuts))
- Utility Knife ((for cutting plastic sheeting and other materials))
Supplies & Materials
- 2-in x 4-in lumber ((for the frame))
- 2-in x 6-in lumber ((for the roof supports))
- Plywood ((for the shelves and walls))
- Plastic sheeting ((for the roof and walls))
- Glazing clips ((for securing the plastic sheeting))
- Screws ((for assembling the frame))
- Nails ((for attaching the plywood and plastic sheeting))
- Weatherproof glue ((for sealing gaps and joints))
- Ventilation materials ((such as windows, vents, or automatic openers))
Step-by-Step Instructions
- 1. First, let’s start with the foundation of our mini greenhouse – we need to choose the right location. This spot should receive plenty of sunlight, at least 6 hours a day, and be close to a water source. Consider the path of the sun and how it will affect your greenhouse throughout the day, as well as any potential shading from trees or buildings.
- 2. Next, we’ll prepare the site by clearing any debris and leveling the ground. This is crucial for ensuring our greenhouse sits evenly and securely. Use a spirit level and some elbow grease to get the ground as flat as possible, and then mark out the area where your greenhouse will sit using a rope or hose to define the shape.
- 3. Now, it’s time to lay the foundation frame, which will provide the base for our greenhouse. This can be made from a variety of materials, including wood or metal, depending on your preference and budget. Ensure it’s sturdy and can support the weight of the greenhouse, including any potential snow load if you live in an area with cold winters.
- 4. With our foundation in place, we can start constructing the wall frames. These will form the structure of our greenhouse and should be spaced evenly apart to provide support for the glazing material, whether that’s glass, polycarbonate, or polyethylene film. Use screws or nails to secure the frames together, making sure they’re square and sturdy.
- 5. The roofing is our next step, and this is where things can get a bit tricky. We need to ensure the roof is pitched at an angle to allow snow to slide off and water to run away. Use rafters to create the slope, and cover them with your chosen roofing material. This could be the same as your walls or something different, like asphalt shingles or corrugated metal.
- 6. Now we get to the fun part – adding the glazing. This is what will let in the light and keep in the heat, so choose a material that’s durable and suitable for your climate. If using glass, consider tempered or laminated for safety; if using plastic, look for UV-stabilized options to prevent degradation. Apply the glazing carefully, following the manufacturer’s instructions for sealing and spacing.
- 7. Our greenhouse is really starting to take shape now, and it’s time to think about ventilation. This is crucial for maintaining a healthy environment inside – too much heat can be just as damaging as too little. Install automatic openers or manual vents to ensure good airflow, especially on warm days. This will help prevent overheating and keep your plants happy and thriving.
- 8. Finally, let’s add some finishing touches, like shelves for your plants, a workbench for potting, and maybe even some irrigation systems to make caring for your plants easier. Consider adding a heater for colder climates or a cooling system for warmer ones. With these final touches, your small greenhouse is ready to become a cozy haven for your herbs, veggies, and flowers to flourish.
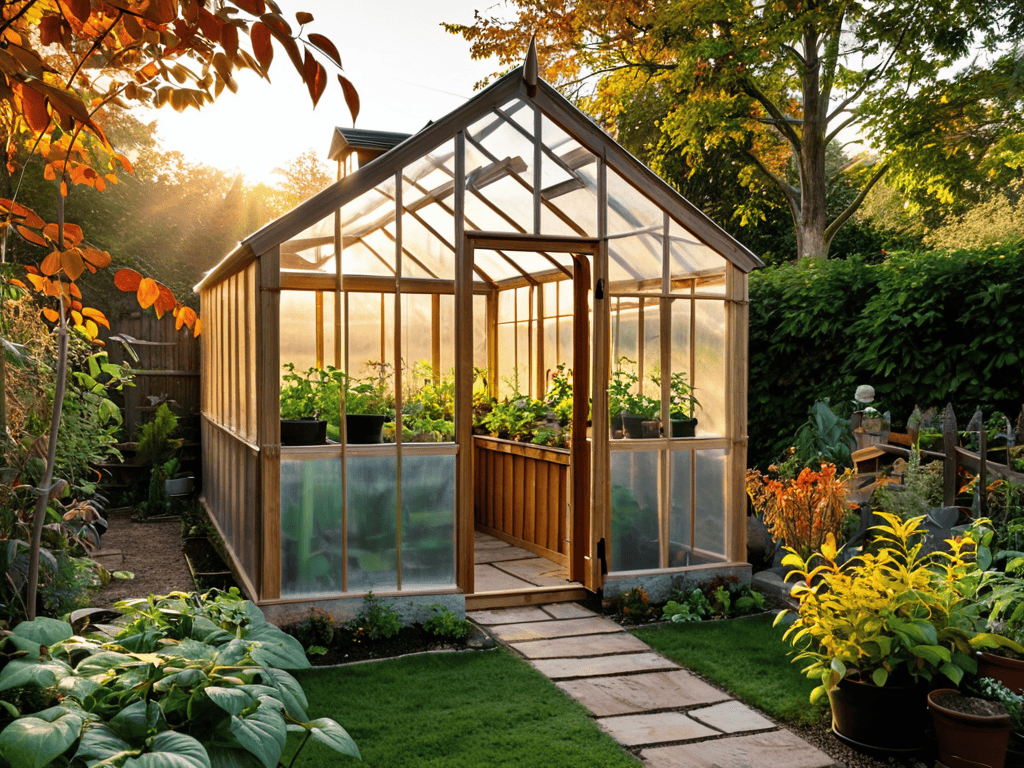
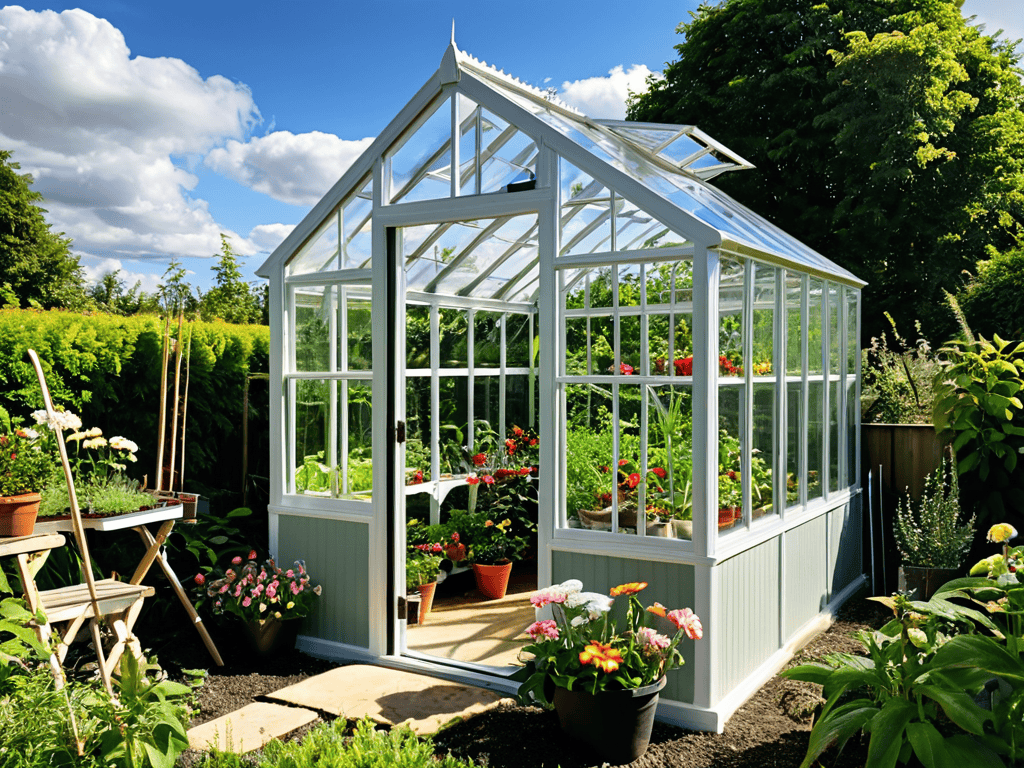
Building a Small Greenhouse
When it comes to creating your own mini indoor oasis, it’s essential to consider the specific needs of your plants. For instance, greenhouse temperature control is crucial to ensure your plants thrive in their new environment. This can be achieved by installing shades or vents to regulate the temperature and provide the perfect conditions for growth.
To make the most of your small greenhouse, explore small greenhouse designs that incorporate vertical gardening techniques. This will not only save space but also add a touch of elegance to your mini greenhouse. You can use trellises, shelves, or even repurpose old pallets to create a unique and functional space for your plants.
As you work on your project, don’t forget to explore diy greenhouse kits and greenhouse insulation options to ensure your structure is energy-efficient and protected from the elements. By following these tips and being mindful of small space gardening tips, you’ll be well on your way to creating a thriving and sustainable mini greenhouse that brings joy and freshness to your home.
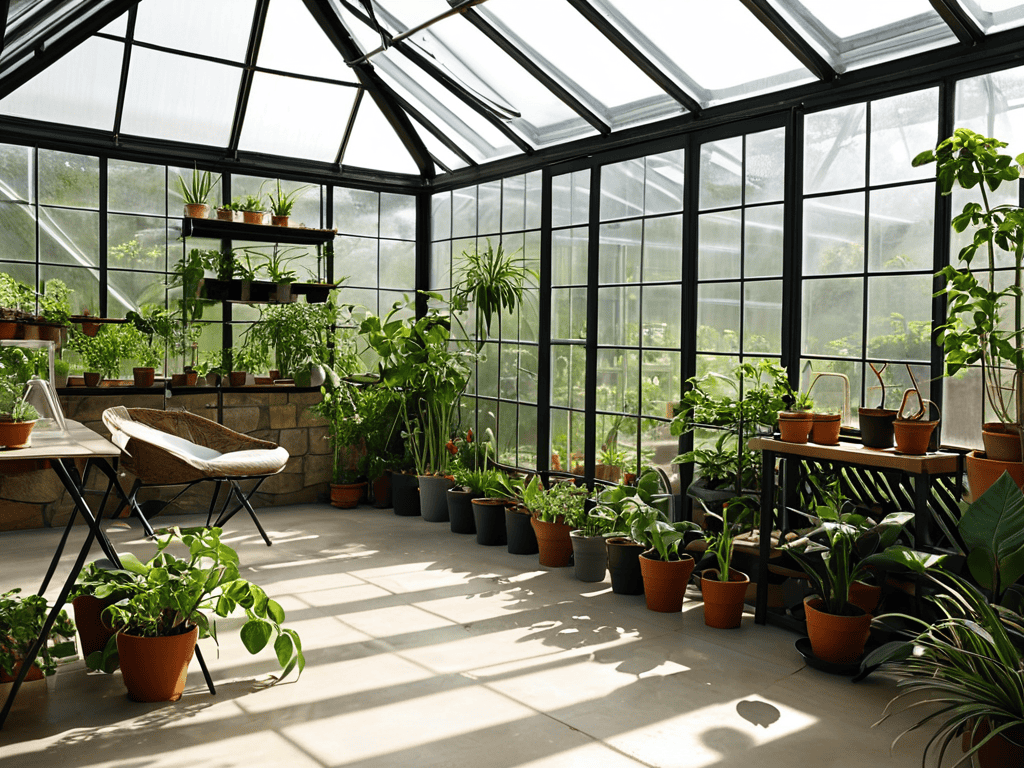
Diy Greenhouse Kits for Vertical Gardening
For a space-saving solution, consider DIY greenhouse kits designed specifically for vertical gardening. These kits usually include a trellis system, allowing you to train vines and climbing plants to grow upwards, maximizing your harvest in minimal space. They often come with a compact, freestanding frame that can be placed against a wall or in a corner, making them perfect for small balconies, patios, or even indoor spaces.
These kits are relatively easy to assemble and can be customized to fit your specific needs and the types of plants you want to grow. Plus, they’re a great way to add some greenery to your space while keeping the floor clear, making them ideal for urban gardeners or those with limited space.
Sowing Magic With Small Greenhouse Designs
As we dive into the world of small greenhouse designs, the possibilities become endless. You can choose from a variety of styles, from modern and sleek to rustic and charming. Consider the space you have available and the type of plants you want to grow. Do you want a compact, wall-mounted model or a freestanding miniature greenhouse? The design you choose will set the tone for your entire indoor oasis.
With a little creativity, your small greenhouse can become a cozy retreat, perfect for escaping the hustle and bustle of daily life. Imagine being surrounded by lush greenery and vibrant blooms, even in the dead of winter. By selecting a design that reflects your personal style, you’ll be inspired to tend to your plants and watch them thrive in their new home.
Nurturing Your Mini Oasis: 5 Essential Tips
- Choose the Right Location: Ensure your small greenhouse receives plenty of natural light, but is also protected from harsh winds and extreme temperatures
- Select the Perfect Materials: Consider using recycled or sustainable materials for your greenhouse frame and walls to reduce your environmental footprint
- Optimize Ventilation and Temperature Control: Proper airflow and temperature regulation are crucial for healthy plant growth, so invest in automatic vents and shading systems if possible
- Start Small and Be Patient: Don’t try to grow too many plants at once, and be prepared to learn and adapt as you go – it’s all part of the journey
- Get Creative with Space-Saving Designs: Make the most of your small greenhouse by using vertical planters, trellises, and tiered shelving to maximize your growing space
Key Takeaways for Your Mini Greenhouse
By following these simple steps, you can create a thriving indoor oasis that brings you fresh herbs and veggies year-round, even in the smallest of spaces
Remember to consider factors like lighting, ventilation, and temperature control when designing and building your small greenhouse to ensure optimal growing conditions
With a little creativity and some DIY magic, you can turn a tiny corner of your home into a lush retreat that not only produces delicious food but also adds a touch of natural beauty to your living space
Cultivating Life
As we nurture the earth within our small greenhouses, we simultaneously nurture our own connection to nature, reminding us that even in the smallest of spaces, growth and beauty can thrive.
Emily J. Miller
Conclusion
As we conclude our journey to building a small greenhouse, let’s recap the key elements that make this project a success. From choosing the right materials to assembling the frame and installing the DIY greenhouse kit, every step is crucial in creating a thriving mini indoor oasis. Whether you’re a seasoned gardener or a beginner, the process of building a small greenhouse is a rewarding experience that allows you to connect with nature and grow your own herbs and veggies year-round.
As you embark on this green adventure, remember that sowing magic is not just about building a structure, but about nurturing life and watching your hard work flourish. With your new small greenhouse, you’ll be able to experiment with different plants, learn about their needs, and enjoy the satisfaction of harvesting your own homegrown produce. So, don’t be afraid to get creative, try new things, and make your small greenhouse a reflection of your personality and style.
Frequently Asked Questions
What are the best materials to use for the frame and walls of a small greenhouse?
For the frame, I recommend using durable materials like cedar, aluminum, or PVC, which can withstand the elements. For the walls, consider glass, polycarbonate, or polyethylene panels – they’re great for letting in sunlight and retaining heat.
How much maintenance and upkeep is required for a small greenhouse to ensure optimal plant growth?
To keep your mini greenhouse thriving, expect to spend about 10-15 minutes daily on maintenance, including watering, pruning, and monitoring temperature and humidity levels. Weekly, set aside some time for cleaning and fertilizing – it’s a small price to pay for a lush, year-round harvest!
Can a small greenhouse be used for growing a variety of plants, including flowers, herbs, and vegetables, or are there specific types that thrive better in this environment?
Absolutely, a small greenhouse is perfect for growing a diverse range of plants, from vibrant flowers to fragrant herbs and crunchy veggies. Most plants thrive in the controlled environment, but some like tomatoes, cucumbers, and lettuce do exceptionally well. Experiment with different types to find your favorites and enjoy a bountiful harvest year-round.