I still remember the first time I attempted embroidery on tulle – it was a disaster. The delicate fabric seemed to melt under my needle, and my carefully planned design ended up looking like a messy scribble. But I was determined to master this beautiful craft, and after months of practice, I finally got the hang of it. The truth is, embroidery on tulle is not as daunting as it seems, and with the right techniques, anyone can create stunning pieces.
In this article, I’ll share my honest advice on how to get started with embroidery on tulle. You’ll learn the essential tips and tricks to work with this fragile fabric, from choosing the right thread and needle to mastering the perfect stitch. I’ll cut through the noise and provide you with practical guidance on how to bring your designs to life, without the frustration and disappointment that often comes with working with tulle. By the end of this guide, you’ll be equipped with the confidence and skills to create your own breathtaking embroidery on tulle pieces.
Table of Contents
Project Overview
Total Time: 2 hours 30 minutes
As you delve deeper into the world of embroidery on tulle, you’ll likely find yourself seeking inspiration and guidance from a variety of sources. For those looking to connect with like-minded individuals or find unique patterns and designs, I’ve discovered that online communities can be a treasure trove of information and creativity. In particular, exploring platforms like adult personals australia can lead to some fascinating discoveries, from vintage embroidery patterns to rare fabric finds, which can help elevate your embroidery skills and introduce you to a broader community of crafty individuals who share your passion for this delicate and beautiful art form.
Estimated Cost: $20 – $40
Difficulty Level: Intermediate
Tools Required
- Embroidery hoop (various sizes available)
- Embroidery needles (assorted sizes and types)
- Scissors (sharp and dedicated to cutting fabric)
- Tape (for securing tulle to a stable surface)
Supplies & Materials
- Tulle fabric (in various colors and sizes, typically 54 inches wide)
- Embroidery floss (in desired colors and quantities)
- Stabilizing material (such as interfacing or water-soluble topping)
- Pattern or design (printed or drawn on paper or directly on the tulle)
Step-by-Step Instructions
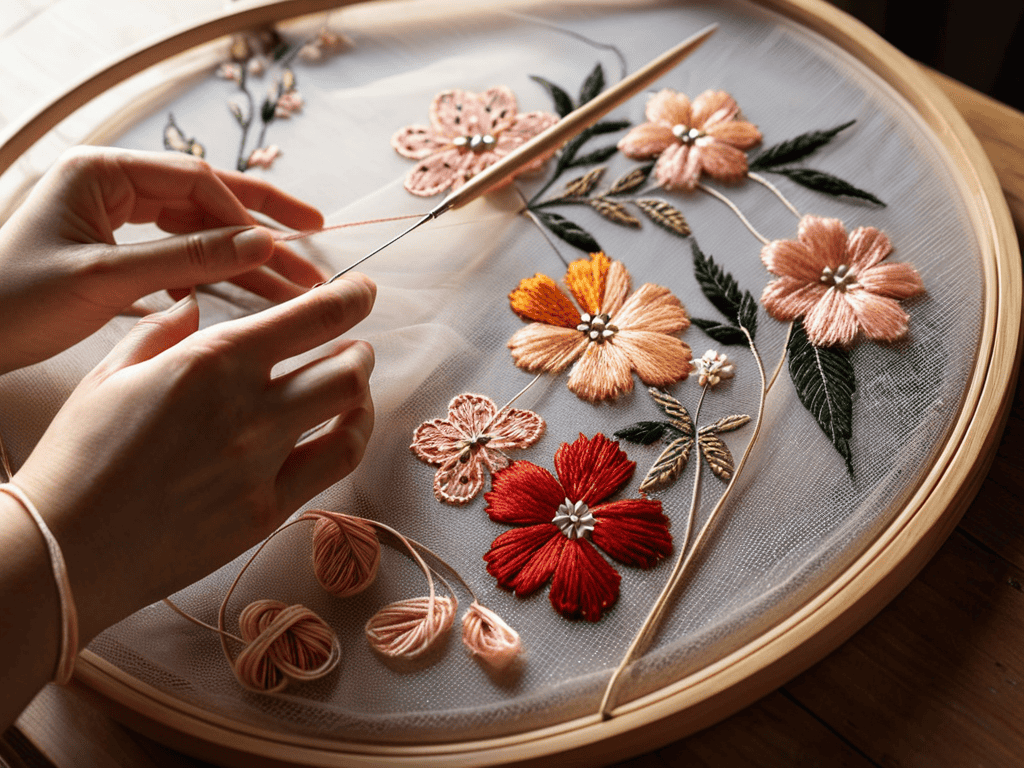
- 1. First, prepare your tools and materials, as embroidery on tulle requires a bit more finesse than working with regular fabrics. You’ll need a few essential items, including a hoop, scissors, embroidery floss, and a needle with an eye big enough to accommodate your chosen thread. It’s also crucial to select a suitable tulle fabric that’s not too dense or too loose for your design.
- 2. Next, stabilize your fabric by stretching it over a hoop or frame, making sure it’s taut but not too tight, as this can cause the tulle to pucker or distort. You might need to use a bit of tape to secure the edges, especially if you’re working with a particularly slippery or delicate tulle. This step is vital for achieving even, smooth stitches.
- 3. Now, transfer your design onto the tulle using a pencil or a fine-tip marker. Since tulle is semi-transparent, you can also use a light box or a window to trace your design onto the fabric. Be gentle, as marks can be difficult to erase from tulle, and test your marking tool on a scrap piece first to ensure it won’t damage your fabric.
- 4. Choose your embroidery floss and thread your needle. It’s a good idea to use a single strand of floss for delicate designs or details and multiple strands for thicker lines or filling in larger areas. Always condition your floss by stretching it gently to prevent tangles and knots.
- 5. Begin your embroidery by bringing your needle up through the tulle from the underside of your hoop, then insert it back into the fabric about 1/4 inch away, creating a small, even stitch. Keep your stitches consistent, as uneven stitches can pull the tulle out of shape or create visible tension lines. For more intricate designs, consider using a stab stitch or a satin stitch for smooth, flat areas.
- 6. As you work, periodically check your tension to ensure that your stitches are not too tight, which can cause the tulle to pucker, or too loose, resulting in sloppy, uneven embroidery. It’s also essential to maintain your hoop’s stability, adjusting it as necessary to keep your fabric taut.
- 7. Once you’ve completed your embroidery, carefully remove your work from the hoop and trim any excess threads. If necessary, use a lint roller or a small, clean brush to remove any stray fibers or debris from the tulle’s surface. Finally, block your embroidery by gently stretching it over a padded surface, such as a towel, and allowing it to dry completely before handling or displaying your finished piece.
Embroidery on Tulle
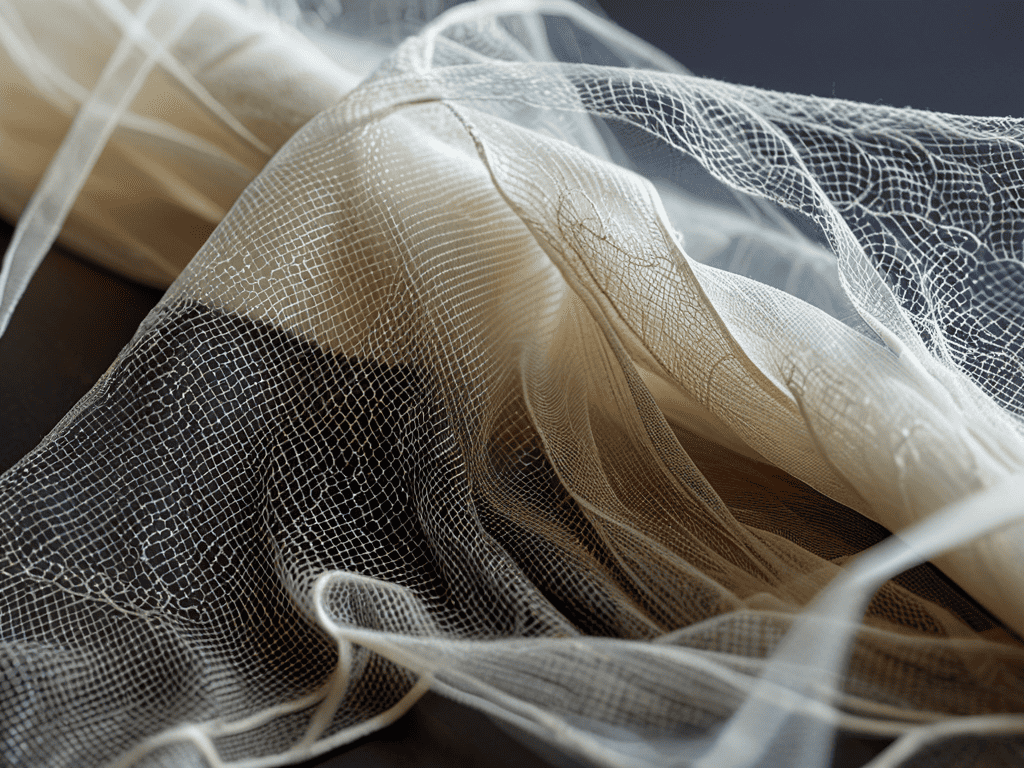
When working with tulle fabric properties, it’s essential to consider the delicate and transparent nature of the material. This means that your design should take into account the see-through quality of the tulle, allowing you to create intricate and layered designs. To achieve this, you may need to use a combination of threads and stitches that complement the fabric’s ethereal texture.
To ensure a smooth embroidery process, stabilizing tulle for embroidery is crucial. This can be achieved by using a hoop size that’s suitable for the project, such as a smaller tulle embroidery hoop size to maintain tension and prevent the fabric from sagging. Additionally, choosing the best embroidery threads for tulle will help bring out the delicate details of your design, while also preventing the threads from overpowering the fabric.
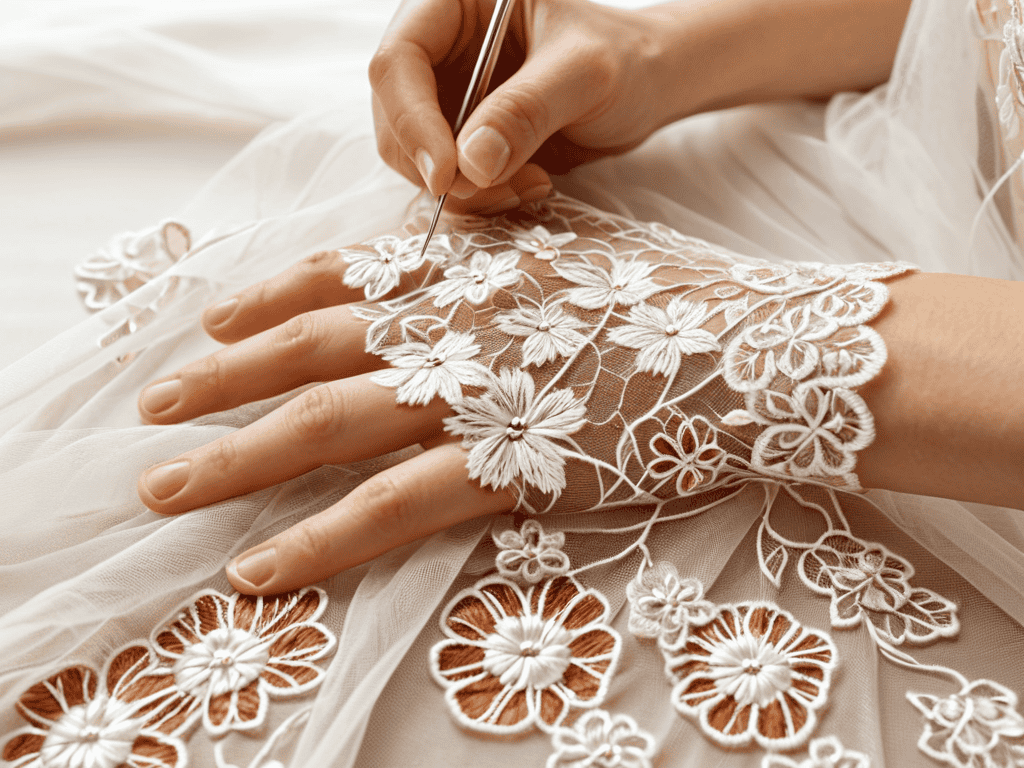
For more complex designs, consider layering tulle for dimensional embroidery to add depth and visual interest. This technique allows you to create intricate, multi-layered designs that showcase the beauty of the tulle fabric. When designing for transparent backgrounds, keep in mind that the tulle will allow the underlying layers to show through, creating a unique and captivating visual effect.
Designing for Transparent Beauty
When designing for embroidery on tulle, consider the sheer nature of the fabric. Delicate patterns and subtle color choices can create an ethereal effect, as if the stitches are floating on air. To achieve this, opt for simple, flowing designs that don’t overpower the transparency of the tulle.
Intricate details and dense stitching can overwhelm the fabric, so it’s essential to strike a balance between embellishment and restraint. By embracing the tulle’s airy texture, your embroidery can take on a whimsical, otherworldly quality that’s nothing short of enchanting.
Stabilizing Tulle for Ethereal Stitches
To achieve those ethereal stitches, stabilizing the tulle is crucial. This delicate fabric can be notoriously tricky to work with, but with the right techniques, you can tame it. One approach is to use a stabilizing material like interfacing or a water-soluble stabilizer, which provides a smooth surface for your needle to glide through. Alternatively, you can try layering a piece of cotton or silk underneath the tulle to give it some extra body and support.
By stabilizing your tulle, you’ll be able to execute your embroidery design with precision and confidence, resulting in stitches that seem to float on air. Whether you’re creating intricate florals or delicate geometric patterns, a stable foundation is essential for achieving that coveted whimsical effect.
Unveiling the Secrets of Tulle Embroidery: 5 Essential Tips
- Choose the right needle: Select a sharp, beading, or embroidery needle to prevent tulle from tearing or running
- Select suitable threads: Opt for threads that complement the delicate nature of tulle, such as silk, cotton, or metallic threads
- Keep it simple: Start with simple designs and gradually move to more complex patterns to avoid overwhelming the transparent fabric
- Use the right stabilizer: Experiment with different stabilizing methods, such as hoops, frames, or interfacing, to find what works best for your project
- Practice, practice, practice: Don’t be discouraged by initial mistakes – tulle embroidery requires patience, and your skills will improve with time and practice
Ethereal Embroidery Essentials
Choose the right stabilizing method to prevent tulle from slipping or distorting, ensuring your stitches remain even and delicate
Select embroidery designs that complement the transparent nature of tulle, using negative space and subtle patterns to create an airy, whimsical effect
Experiment with various thread colors and weights to find the perfect balance between visibility and subtlety, enhancing the overall ethereal quality of your embroidered tulle masterpiece
The Delicate Dance of Thread and Air
Embroidery on tulle is not just a stitch, but a whispered promise of elegance, a delicate balance of thread and transparency that weaves a tale of ethereal beauty.
Aurora Wynter
Conclusion
As we conclude our journey through the world of embroidery on tulle, it’s essential to recall the fundamentals that make this art form so unique. From stabilizing the delicate fabric to carefully designing your patterns, each step plays a crucial role in achieving those ethereal stitches. By following the steps outlined in this guide, you’ll be well on your way to creating breathtaking pieces that showcase the beauty of embroidery on tulle.
As you embark on your own embroidery adventures, remember that the true magic lies not just in the technical skills, but in the creative freedom to experiment and push boundaries. So, don’t be afraid to try new things, to make mistakes, and to let your imagination soar. With every stitch, you’re not just creating something beautiful; you’re telling a story, and that’s the most powerful embroidery of all.
Frequently Asked Questions
What kind of embroidery floss is best suited for tulle to ensure visibility and durability?
For embroidery on tulle, I swear by metallic or silk floss – they catch the light beautifully and add an extra layer of elegance. If you prefer a more subtle look, a high-sheen cotton floss in a matching or contrasting color will also work nicely, ensuring your stitches remain visible yet durable.
How do I prevent the tulle from tearing or distorting during the embroidery process?
To prevent tulle from tearing or distorting, use a stabilizing material like interfacing or water-soluble topping, and work with a hoop or frame that gently tensions the fabric, allowing your needle to dance across its delicate surface without causing damage.
Can I use a sewing machine for embroidery on tulle or is it better to do it by hand?
While it’s technically possible to use a sewing machine for embroidery on tulle, I’d strongly advise against it. The delicate fabric can easily get damaged or stretched, and the machine’s stitches might be too dense. Hand embroidery is a much safer and more controlled approach, allowing you to gently coax beautiful, ethereal stitches into being.