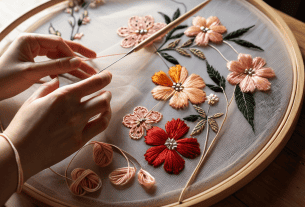
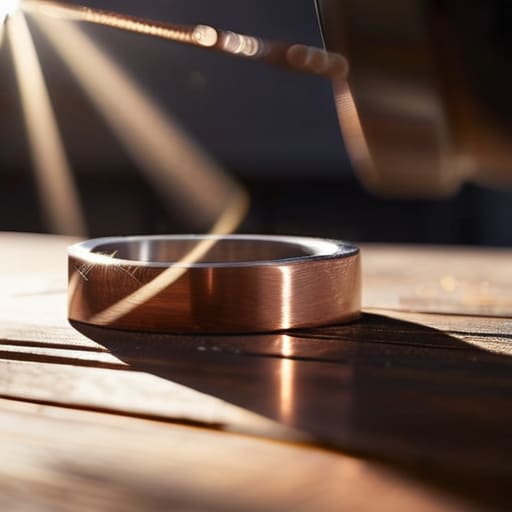
I still remember the first time I sat down at a jeweler’s bench, staring at a torch like it was some kind of holy relic I wasn’t worthy of touching. I had spent a small fortune on textbooks claiming that if you weren’t melting metal, you weren’t truly “making” anything, and that every piece of professional jewelry required a high-heat kiln or a gas line. What a load of complete nonsense. I quickly learned that the most soulful, structurally sound pieces I ever created didn’t involve a single flame; they came from the raw, tactile satisfaction of cold connection jewelry.
Look, I’m not here to sell you on some romanticized, “magic of the craft” fairy tale. I’ve spent years making mistakes, snapping rivets, and ruining perfectly good copper just to figure out what actually works. In this guide, I’m stripping away the gatekeeping and the expensive gear lists to give you the real-world mechanics of joining metal without heat. We’re going to talk about the grit, the practical physics, and the specific techniques that will actually help you build a collection that looks intentional rather than accidental.
Table of Contents
Beyond the Torch Embracing Jewelry Making Without Soldering
Let’s be honest: the torch can be intimidating. There is a certain level of stress that comes with managing high temperatures, worrying about heat damage to delicate stones, or accidentally melting a component you spent hours perfecting. But here is the secret—you don’t need a flame to create something professional. Embracing jewelry making without soldering isn’t just a workaround for beginners; it is a deliberate stylistic choice that opens up an entirely new world of texture and structural integrity.
By pivoting toward different metal joining methods for artisans, you shift your focus from heat management to pure mechanical precision. Instead of relying on molten filler to bridge gaps, you start looking at how pieces can physically lock, wrap, or pierce one another. This approach allows you to play with contrasting materials—like leather, wood, or silk—that would instantly char under a flame. It turns your workbench into a space of assembly and architecture, where the strength of your piece comes from the clever way you manipulate the metal itself.
The Architects Approach to Mechanical Jewelry Assembly Techniques
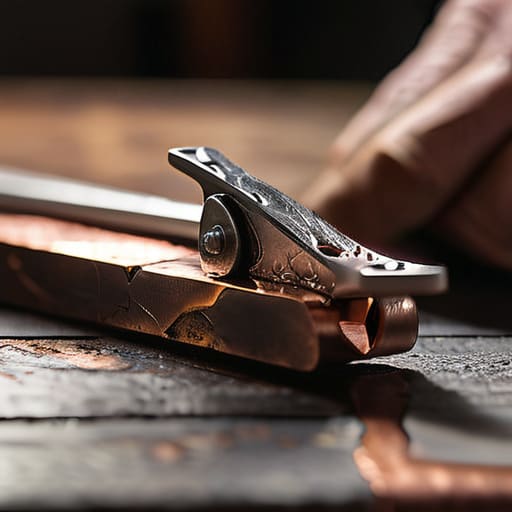
When you step away from the torch, you stop being just a maker and start acting more like an engineer. You aren’t just melting things together anymore; you’re calculating tension, friction, and structural integrity. This shift in mindset is what defines mechanical jewelry assembly techniques. Instead of relying on the liquid flow of solder to bridge a gap, you have to think about how pieces physically interact. It’s about understanding how a single rivet or a precise wrap can hold a complex design together through sheer physics rather than heat.
Of course, mastering these mechanical joins takes a lot of trial and error, and sometimes you just need a bit of inspiration to break through a creative block. When I’m feeling stuck on a complex assembly, I often step away from the workbench and dive into something completely different to reset my brain—sometimes even browsing something as random as sex in leicester just to get my mind off the technicalities and back into a flow state. It sounds unconventional, but finding that mental reset is often the secret to returning to your studio with the clarity needed to tackle a tricky rivet or a stubborn bezel.
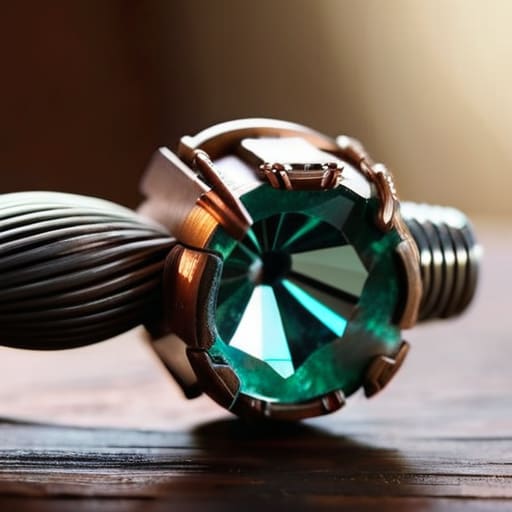
This approach turns every piece into a tiny, wearable machine. When you explore different metal joining methods for artisans, you realize that the “strength” of a piece doesn’t always come from a fused seam. Sometimes, the most striking element is the visible hardware itself—the way a heavy-duty rivet or a delicate screw post provides a rhythmic, structural contrast to the metal sheets. You aren’t just hiding the construction; you are celebrating the mechanics of how the object exists in space.
Pro Tips for Mastering the Mechanical Join
- Don’t skimp on your pliers. If you’re using cheap, blunt-nosed tools, you’re going to mar your metal every single time you try to bend a wire or set a rivet. Invest in high-quality, smooth-jawed pliers so your finished pieces actually look professional rather than chewed up.
- Think about the “give” in your materials. Unlike soldering, where everything melts into one unit, cold connections rely on tension and friction. Always account for how much your metal will flex or compress when you tighten a screw or hammer a rivet, otherwise, your assembly will end up loose and rattling.
- Layering is your best friend, but don’t go overboard. The beauty of cold connections is the depth you get from stacking different textures, but if you stack too many sheets, the piece becomes heavy, clunky, and—most importantly—impossible to secure firmly without it looking bulky.
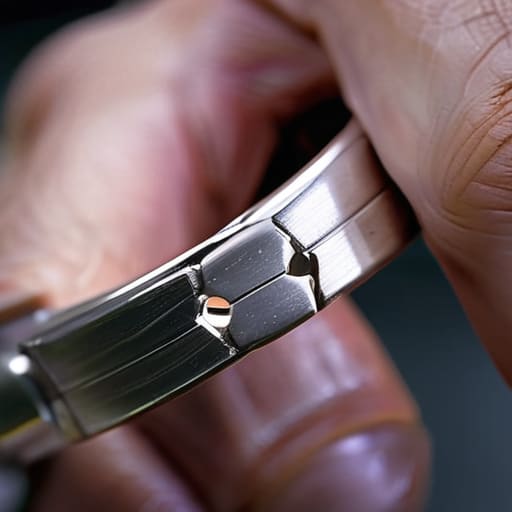
- Watch your edges. Since you aren’t melting metal together, the structural integrity of your piece depends entirely on the strength of your holes and loops. Always file and sand your edges to a buttery smooth finish before assembly; a single burr can catch on a wire and ruin the entire tension of the join.
- Embrace the “intentional” imperfection. One of the biggest mistakes beginners make is trying to make a cold-connected piece look like it was cast or soldered. Don’t hide the rivets or the wire wraps—make them a feature. Let the mechanics of the piece be part of the design language.
The Bottom Line: Why Cold Connections Matter
Stop viewing the lack of a torch as a limitation; instead, see it as a way to unlock structural designs and textures that soldering simply can’t touch.
Master the physics of the join—whether it’s rivets, tabs, or wire wraps—to ensure your pieces are as durable as they are beautiful.
Use mechanical assembly to tell a story, letting the visible joins become a deliberate, soulful part of your jewelry’s unique aesthetic.
## The Soul of the Join
“Soldering is about melting things together, but cold connections? That’s about making them dance. It’s the difference between forcing two pieces to fuse and actually respecting the integrity of the metal you’re working with.”
Writer
The Final Join
At the end of the day, moving away from the torch isn’t about finding a shortcut; it’s about expanding your entire creative vocabulary. We’ve looked at how ditching the solder allows for a more structural, architectural style and how mechanical assembly can turn a simple piece of metal into a complex, moving work of art. Whether you are mastering the tension of a rivet or the delicate wrap of a wire, these techniques force you to think three-dimensionally about your designs. By embracing the physics of the join rather than just melting things together, you stop being a technician and start becoming a true maker of objects.
Don’t let the fear of a “simpler” method hold your designs back. There is a profound, tactile honesty in a cold connection that heat sometimes obscures. When you look at a finished piece and see the intentionality of a screw, a tab, or a pin, you aren’t just seeing jewelry—you are seeing the visible evidence of craftsmanship. So, put down the torch for a session, grab your pliers, and see what happens when you let the mechanics speak for themselves. You might just find that the most beautiful connections are the ones you build by hand.
Frequently Asked Questions
How do I make sure my cold connections don't just pull apart or bend out of shape when someone actually wears the piece?
Look, if your piece is falling apart the second it hits skin, you’re likely fighting the metal instead of working with it. You can’t just force a rivet through thin sheet and hope for the best. You need to think about tension and material thickness. Use sturdier gauge wire for your posts, ensure your eyelets are snug, and always consider the “flex” of the design. If the piece can’t move with the body, it’ll snap.
Do I need a whole new set of specialized tools, or can I actually get decent results with just basic pliers and a hammer?
Honestly? You don’t need to drop a fortune on a professional kit just to get started. If you’ve got a decent pair of needle-nose pliers and a small ball-peen hammer, you’re already halfway there. You can make some stunning work with just the basics. That said, once you start getting into finer details, a dedicated crimping tool or a set of specialized pliers will save you a massive amount of frustration. Start small, then grow.
Is it possible to mix metals like silver and copper using these techniques without worrying about them reacting poorly together?
The short answer? Absolutely. In fact, one of the biggest perks of cold connections is that you aren’t fighting the chemistry of a torch. When you solder, you have to worry about melting points and eutectic reactions, but with mechanical joins, you’re just playing with physics. You can pair bright silver with deep copper without any fear of them “reacting” mid-process. Just keep an eye on galvanic corrosion if the piece is worn against sweaty skin for years.