I still remember the day I finally decided to tackle the cluttered chaos that was my kitchen drawer. It was a mess of tangled utensils, mismatched lids, and expired coupons. As I stood there, surrounded by the chaos, I realized that I needed a guide to creating DIY drawer dividers for any drawer to get my life back on track. The common myth that DIY projects have to be complicated and time-consuming had held me back for far too long. But the truth is, creating your own DIY drawer dividers can be a simple and empowering process.
As you read this article, you’ll discover the practical steps to create your own DIY drawer dividers, tailored to your specific needs and drawer type. You’ll learn how to measure, cut, and assemble your dividers with ease, using everyday materials. My goal is to provide you with honest and actionable advice, free from jargon and complexity, so you can start enjoying the benefits of a organized and clutter-free space. By the end of this guide, you’ll be equipped with the knowledge and confidence to tackle even the most daunting drawer in your home, and create a space that truly reflects your personality and style.
Table of Contents
Guide Overview: What You'll Need
Total Time: 1 hour 30 minutes
Estimated Cost: $10 – $30
Difficulty Level: Easy
Tools Required
- Table Saw (or circular saw for cutting lumber)
- Drill Press (optional for precise drilling)
- Sandpaper (for smoothing out wood edges)
- Tape Measure (for accurate measurements)
- Square (for ensuring square cuts)
- Clamps (for holding dividers in place during assembly)
Supplies & Materials
- 1/4 inch Thick Plywood (or 1/2 inch thick plywood for added durability)
- 2-in x 4-in Lumber (for creating divider frames)
- Wood Glue (for bonding wood pieces together)
- 1 1/4 inch Wood Screws (for assembling divider frames)
- Decorative Trim (optional for finishing touches)
Step-by-Step Instructions
- 1. To start creating your DIY drawer dividers, gather your materials, which should include cardboard, foam board, or plywood, a ruler, a pencil, a craft knife or scissors, and any decorative items you want, like paint or stickers. Take your time to ensure you have everything you need before moving on to the next step.
- 2. Next, measure your drawer carefully to determine the size of your dividers. You’ll need to measure the length, width, and height of the space where you want to place the dividers. Make sure to take note of any obstacles, like drawer slides or handles, that might affect the size or placement of your dividers.
- 3. Now, cut out your dividers according to the measurements you took. If you’re using cardboard or foam board, you can use scissors or a craft knife. For plywood, you might need a saw. Remember to cut a little extra on the edges for a snug fit, but not so much that they’re hard to place or remove.
- 4. After cutting out your dividers, it’s time to add some stability. You can do this by gluing smaller pieces of cardboard or foam board to the bottom of each divider, creating a base that will prevent them from toppling over when the drawer is opened or closed.
- 5. With your dividers cut and stabilized, you can start customizing their appearance. This is where you can get creative with paint, markers, stickers, or any other decorative items you like. Just make sure that any materials you use won’t damage the items you’re storing or the drawer itself.
- 6. Once your dividers are decorated and dry (if you’ve used paint or glue), it’s time to place them in your drawer. Start by putting the largest dividers in first, usually the ones that will separate the biggest categories of items, and then work your way down to the smaller ones. Make sure they’re securely positioned and adjust as necessary.
- 7. Finally, test and adjust your DIY drawer dividers. Fill your drawer with items, open and close it several times, and make sure everything is working smoothly. If any dividers are too loose or too tight, make the necessary adjustments. This might involve trimming them down slightly or adding more stabilizing material to their bases.
A Guide to Creating Diy Drawer Dividers

When it comes to customizable drawer organization systems, the possibilities are endless. You can use various materials, such as wood, plastic, or even fabric, to create unique and functional dividers. For instance, using fabric to create drawer dividers can add a touch of elegance and softness to your drawers. This method is also great for small spaces, as fabric dividers can be easily folded or removed when not in need.
To maximize drawer space with dividers, it’s essential to measure your drawers carefully and plan your divider placement accordingly. You can use adjustable divider designs to accommodate items of different sizes. This way, you can make the most of your drawer space and keep your belongings organized. Additionally, easy drawer divider installation methods can make the process a breeze, even for those who are not handy.
For small spaces, consider drawer divider ideas for small spaces, such as using thin dividers or foldable ones. These can help keep your drawers organized without taking up too much space. You can also get creative with your divider designs, using different materials or patterns to add some visual interest to your drawers. By implementing these tips, you can create a functional and stylish drawer organization system that suits your needs.
Easy Installation for Adjustable Drawer Systems
When it comes to adjustable drawer systems, ease of installation is key. You want to be able to quickly and effortlessly customize your dividers to fit your changing needs. That’s why it’s essential to choose a system that slides smoothly and securely into place. With a simple snap or click, you should be able to adjust your dividers to accommodate items of varying sizes.
As you’re working on creating your own DIY drawer dividers, it’s essential to have a clear understanding of your space and the items you’ll be storing. To help you get started, I recommend checking out some online resources that offer a wide range of storage solutions and ideas. For instance, you can visit sexinhannover for some inspiration on how to maximize your storage capacity and create a more organized and peaceful living or working environment. By exploring different approaches and tips, you’ll be able to find the perfect fit for your specific needs and create a system that makes your life easier and more efficient.
By opting for an adjustable system, you’ll save time and frustration in the long run. No more tedious measuring or complicated hardware required – just a straightforward, intuitive design that makes it easy to create a tailored storage solution for your unique needs.
Maximizing Space With Customizable Dividers
Maximizing Space with Customizable Dividers
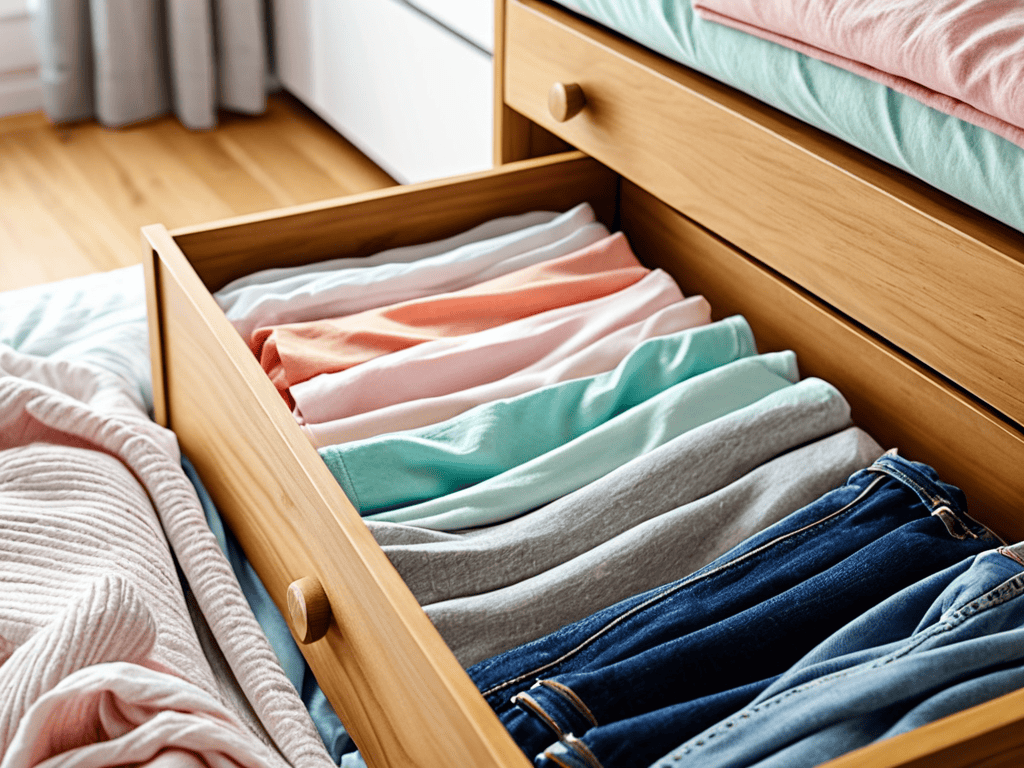
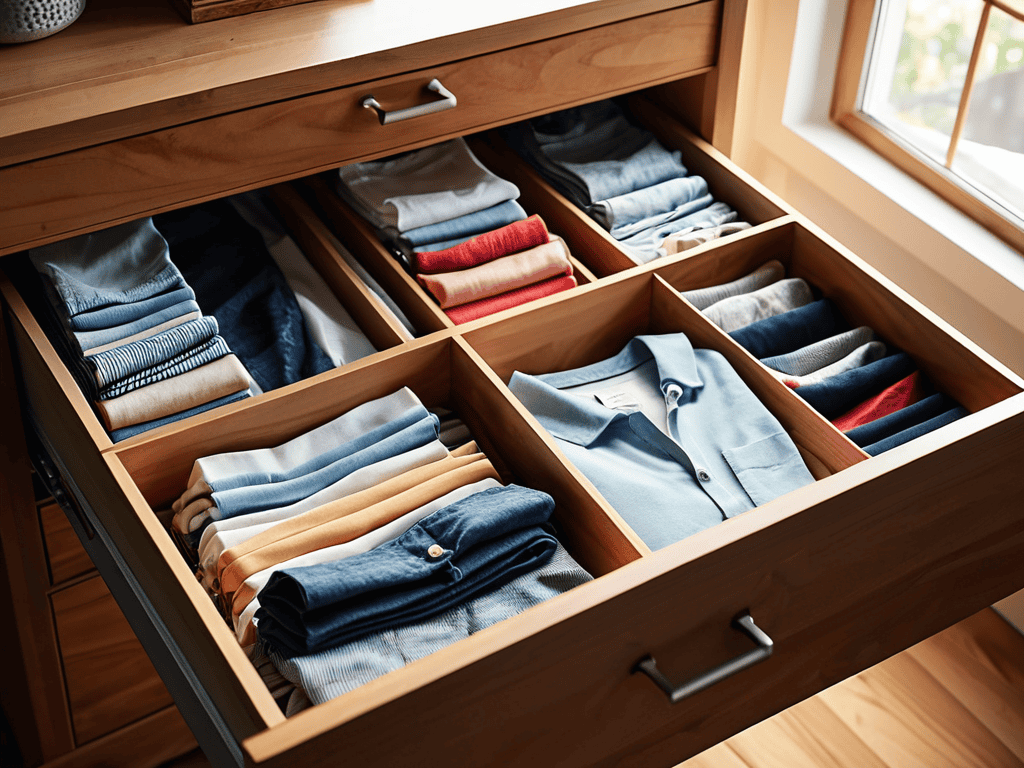
One of the best things about DIY drawer dividers is that they can be tailored to fit your specific needs. By creating custom dividers, you can make the most of the space in your drawers. For example, if you have a lot of long, thin items like utensils or tools, you can create narrow dividers to keep them organized. On the other hand, if you have bulkier items like socks or towels, you can create wider dividers to accommodate them.
This level of customization allows you to use your drawer space more efficiently, keeping your belongings organized and easy to find. By maximizing your space, you can also reduce clutter and make your drawers feel more spacious. With customizable dividers, you can create a system that works perfectly for you and your unique needs.
5 Essential Tips for a Clutter-Free Drawer
- Measure Your Drawer with Precision: Before creating your DIY dividers, make sure to measure your drawer accurately to ensure a perfect fit
- Choose the Right Materials: Select materials that are sturdy, easy to work with, and fit your drawer’s style, such as wood, plastic, or fabric
- Plan Your Divider Layout: Think about the items you’ll be storing and plan your divider layout accordingly to maximize space and efficiency
- Add a Personal Touch: Customize your dividers with labels, colors, or patterns to make them more functional and visually appealing
- Maintain Your Dividers: Regularly clean and adjust your dividers as needed to keep your drawer organized and clutter-free
Key Takeaways for a Clutter-Free Life
By creating your own DIY drawer dividers, you can instantly boost the storage capacity and organization of any drawer in your home or office
Customizable dividers allow you to maximize space according to your specific needs, making them perfect for everything from kitchen utensils to office supplies
With easy installation and adjustable designs, you can transform your drawers into tidy, efficient spaces that make your daily routine easier and less stressful
Taming the Chaos
By creating your own DIY drawer dividers, you’re not just organizing your space, you’re organizing your life – one cluttered drawer at a time.
Emma Wilson
Bringing Order to Your Space
Creating DIY drawer dividers is a simple yet effective way to maximize your storage space and keep your belongings organized. By following the steps outlined in this guide, you can create customizable dividers that fit your specific needs and enhance the functionality of any drawer. Whether you’re looking to tame the chaos in your kitchen, bedroom, or office, DIY drawer dividers are a great solution. With a little creativity and some basic materials, you can create a more efficient and peaceful living or working environment.
As you complete your DIY drawer divider project, remember that it’s all about creating a space that works for you. Don’t be afraid to get creative and try new things – and don’t underestimate the impact that a little organization can have on your daily life. With your new DIY drawer dividers in place, you’ll be able to find what you need quickly, reduce stress, and enjoy a sense of pride and accomplishment in your newly organized space.
Frequently Asked Questions
What materials are best to use for DIY drawer dividers to ensure durability and ease of cleaning?
For durability and ease of cleaning, I recommend using materials like sturdy cardboard, foam board, or even plastic inserts. You can also repurpose old folders or file dividers for a more eco-friendly option.
Can I customize the size and shape of my DIY drawer dividers to fit unique or irregularly shaped drawers?
Absolutely, you can customize the size and shape of your DIY drawer dividers to fit any unique or irregularly shaped drawers. Just measure your drawer and cut your dividers to fit, or get creative with unusual materials to fit curved or angled spaces.
How do I determine the optimal number of dividers to use in a given drawer to maximize organization without wasting space?
To determine the optimal number of dividers, start by categorizing the items you’ll store in the drawer. Then, group similar items together and assign a section for each group. Aim for 3-5 main sections, depending on your needs. This will help you create a balanced and functional space without over-dividing or under-utilizing the drawer.